So you just got a power meter? Great now do this…..
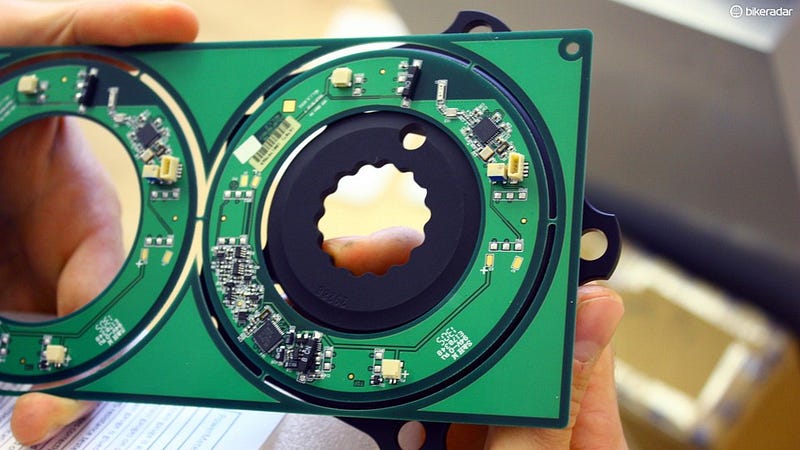
1. Set It Up Correctly
First things first, unbox it and send the photos to you all your friends in an effort to make them jealous which in fact will tell them only that you are five years late to the power meter party 😂
Get it set up by charging it, installing correctly, and ideally checking calibration. This is done either against another power meter (doh!), against a handing known weight, against know outside variables in an app OR and this one is a nice cheat…. against a hill climb on a calm day (try fft.tips/climb). Why a hill climb? Because a steep climb effectively means you are eliminating wind, aero and CRR
2. Sync your power meter to an App like Strava
Second, set up your power meter to read on your head unit (or fancy watch), or PC with ant+ dongle, or ipad and then sync it with your favourite app. Personally I think you should always use either Strava or TrainingPeaks (basic) by default to upload and store or your data. Both are free but strava is my go to app because its social, it has apps, it almost never crashes (er kindof!), and its mapped. Strava also then links back to trainingpeaks and intervals.icu if you are getting more serious about your data.

3. Prepare to be Disappointed
OK, now you are ready to measure something. Your first uphill ride, your first loop circuit, your first TT? Invariably you will be disappointed. I explain why here
Essentially those big wattage numbers you have seen on TV will suddenly appear rather unreal!
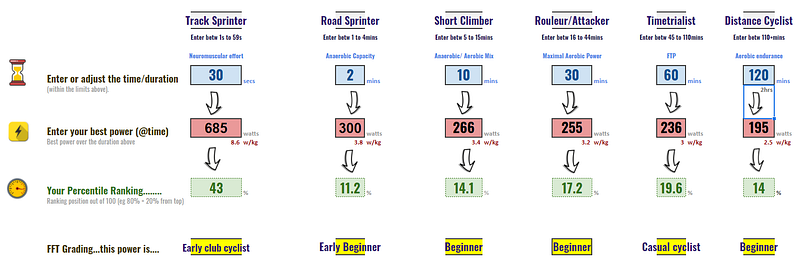
If you want to keep it real, have a look at our “rankme” spreadsheet here
4. Get a Baseline (FTP)
Now is the time to get a baseline. I mean your FTP (functional threshold power). Yes, its hotly debated, yes there is no gold standard test but for the purposes of getting on the board, anything will do
A. Ramp test (included in zwift, trainerroad etc)
B. 20min test (by protocol is actually around 50mins)
C. 60min test (ie 60min best power against the clock)
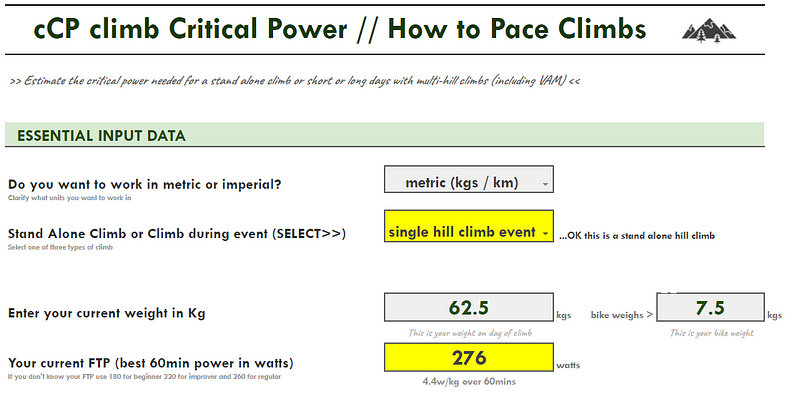
If you don’t fancy any of those, don’t worry, a nice shortcut is you can actually do your best effort against ANY time/distance and we will backwards calculate your likely FTP here.
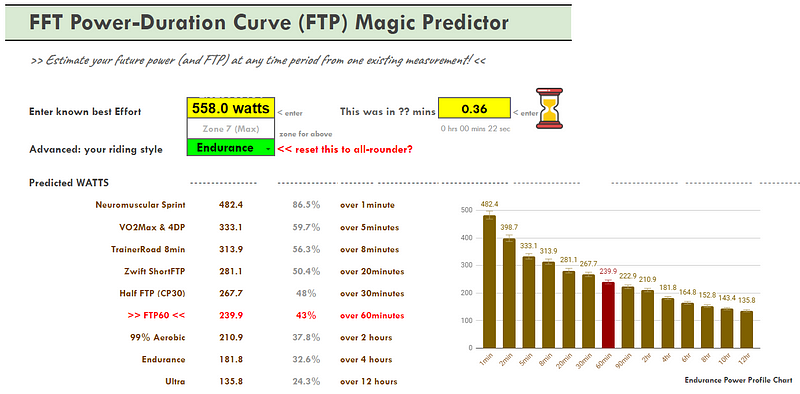
True, the closer time you do to 60mins, the more accurate it will be, and be careful of your cycling phenotype (aka riding style). You can read all about the limitations here.
5. Plan Your Training Using Power
Once you have your baseline (above), you can now plan your training much more accurately. That includes how hard to train today, when to rest and what training to do in the future.
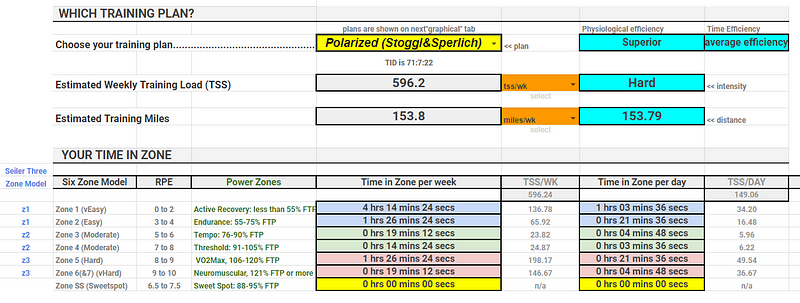
How hard to train today?
This is basically covered by our Time-inZone calculator https://fft.tips/tiz
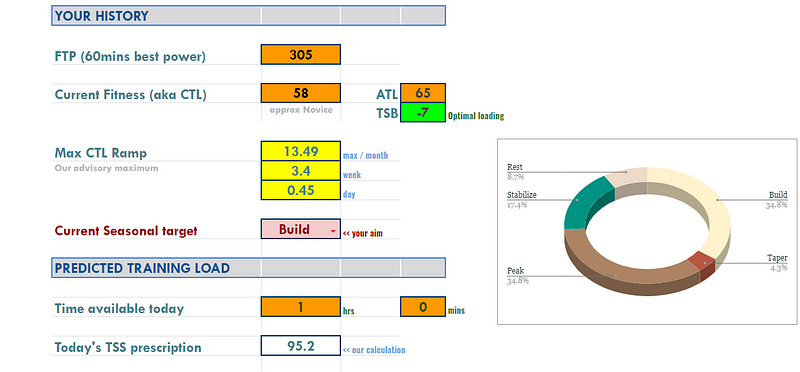
When to rest?
This is essentially a function of your training load (or duration x intensity squared)….and you can get that in ICU or Strava or Peaks or in our CTL calculator here:
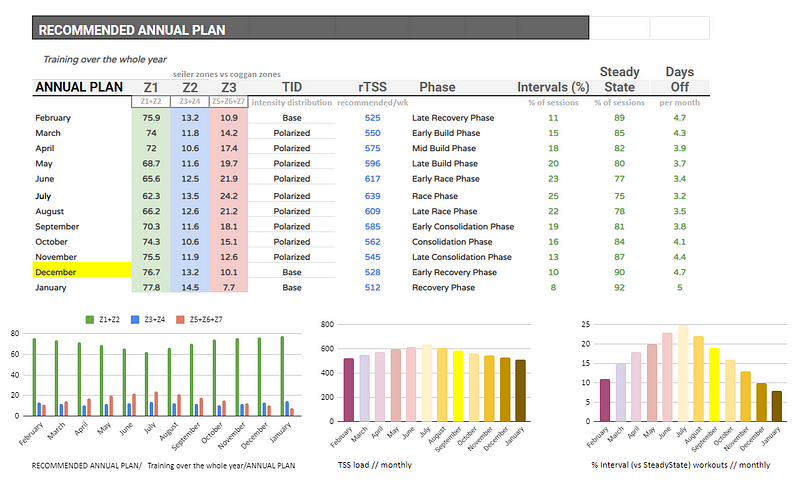
What training to do in the future?
This is called “periodization” which is a function of your objectives, your experience and your available training time and of course we have a calculator for that here
6. Pace your event or Race Using Power
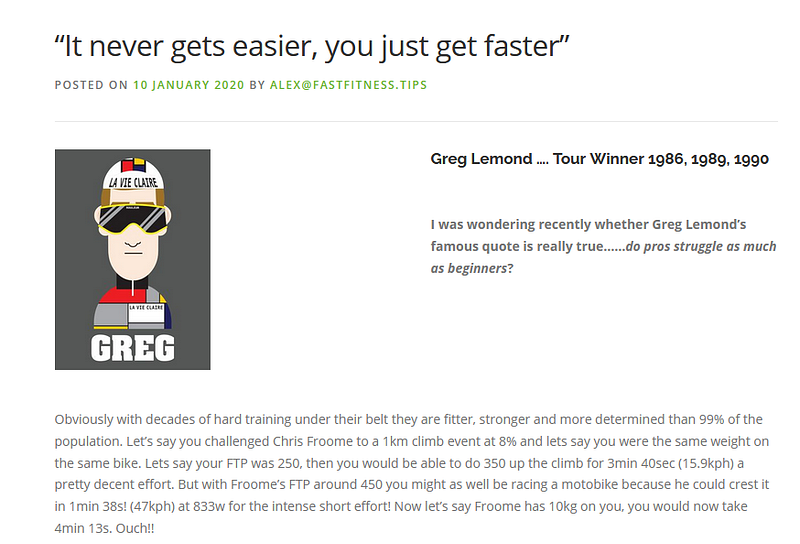
Now you have power, you can approach all your events or races in a different way…..learn to ride by power. This will open up a fresh view on pacing. I guarantee for years you have been setting off too hard and risking blowing up near the end. OK its not as simple as that and we made several videos just on pacing and a secret calculator but the bottom line is when you ride by power you start to properly understand the effect of gradient, drafting, hills and wind. Over time, the more experienced you get, you can learn to ride without power BUT knowing how it feels at 200,300,400 watts. Then you have come full circle, it looks a bit like this:

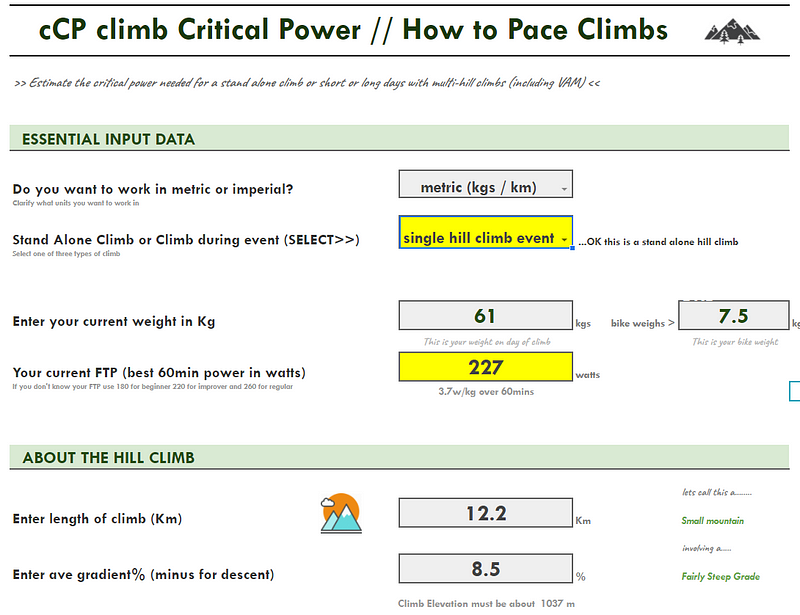
7. Climb Using Power
Probably the hardest thing to master in cycling is climbing. That because its uphill you slow down and it seems to go on forever, but the same distance downhill is over in a flash! How do you correctly pace those hills? In a nutshell if you are aiming for the fastest time, but most (rule of thumb 80% of your energy into the uphill and 20% to the downhill). The exact power / your FTP (aka IF) depends on the length and gradient of the hill. Fortunately we have done is all for you here:
8. Relook at Marginal Gains with Fresh Eyes
The power in a power meter is often to relook at things with fresh scientific eyes. Nearly everything in cycling contains misunderstandings or assumptions that are frankly wrong. Examples are the aero gains of helmets, gains of OSPW, gains of the latest frames. We have covered most topics in other areas, but the beauty of your power meter is you can do you own testing.
In the past this used to be a little complicated with Cheung method or Golden Cheetah Aero lap (read). However a number of apps are coming that will redefine this field and make this a lot easier. For now, take a look at my post on cycle helmets vs a bald head!

9. Get more accurate
Before we are done, just check your power meter is as accurate as possible. Some basics would be….is it measuring double sides left and right? is it measuring with high frequency sampling, is it measuring before or after drivetrain losses, finally is measuring the same in different temperatures and conditions? If you are only comparing improvement against your own baseline this doesn’t matter too much but if you are comparing against others, then yes it does.
10. Finally don’t do this
Just a word of warning, don’t get obsessed by the numbers, don’t become a slave to the power meter. Some people refuse to ride at all without their power meter, some people trick their power meter to show a high figure, some people buy 2,3,4 power meters…..oops dam it, scrub that last one 😂
Seriously, don’t let the power number demotivate you, or stop you training. Remember its a tool to improve and encourage your training.

Just like a good dog, a power meter should always be helping you, never hurting you!